Online Seedvr

Practical guide

How to Use SeedVR Upscaler for a Better-Looking Video

If you are learning how to use seedvr upscaler, begin with a short clip you know well. The steps below show how to prepare footage, use the available SeedVR interface, and judge the result without assuming every apparent detail is genuine.

Seedvr video enhancement imagery

Choose your approach

Three decisions that shape the result

Your source, processing route, and review method matter more than simply choosing the largest output. These examples show where different workflows need extra attention.

Video editor

You have a compressed client clip with faces, titles, and quick cuts. Save an untouched copy and select a short section containing all three before processing the full edit. Check the output at normal playback speed as well as frame by frame; a single sharp still cannot reveal flicker.

A representative test helps you decide whether SeedVR improves the deliverable without changing important details. If you would rather work through a browser-based entry point, check the available upload and output options before committing a long clip.

seedvr online upscaler

Local workflow builder

You want SeedVR inside an existing node-based video pipeline. First confirm which model and node implementation your workflow actually uses; similarly named projects may expose different controls. Test a few frames before connecting a long sequence or adding more processing stages.

A small, repeatable test makes it easier to isolate changes caused by upscaling rather than by denoising, interpolation, or export settings elsewhere in the pipeline.

seedvr2 comfyui

GPU-limited creator

You plan to process video on a machine with limited graphics memory. Check the requirements of your specific SeedVR implementation and begin with a short, modest-resolution sample. Keep other GPU-heavy applications closed during the test, and note whether your chosen settings complete without errors.

The test tells you more about your machine than a general compatibility claim. If memory is tight, explore implementation-specific options or a hosted route rather than assuming one setting will fit every clip.

seedvr2 8gb vram

Quality reviewer

You are deciding whether SeedVR belongs in a repeatable restoration workflow. Use the same source segment for each candidate, keep the final display size consistent, and compare fine textures, moving edges, faces, and text. Record visible problems rather than relying on a single preference for sharpness.

A matched comparison helps distinguish useful recovered-looking detail from halos or invented texture. Compare methods on your own footage because a result that favors one scene may not favor another.

seedvr2 vs flashvsr

Working sequence

Step-by-step

Treat the first pass as an evaluation, not a final export. Interface names and available controls depend on the SeedVR route you choose.

Prepare a representative sample

Keep the original file and trim a short segment that includes the hardest parts of your footage: movement, a face, fine patterns, captions, or a dark scene. Inspect the source at its native size first. If text is already unreadable or a face is heavily obscured, an upscaler cannot verify what was originally there. Note the source resolution and frame rate so you can compare the processed clip fairly.

Open the route and check its controls

Follow the SeedVR link, then read the destination's current instructions, accepted inputs, and any displayed limits. Supply the test clip only if that interface accepts your file type and size. If it offers an output scale or quality controls, start conservatively and change one option at a time. Do not assume a prompt box, a particular preset, or a specific export format exists; those details vary between implementations.

Compare, then decide whether to continue

View the source and SeedVR result at the same display size and inspect several moments, not just the best-looking frame. Check facial features, lettering, edges against the background, and textures while the camera moves. Watch for shimmer, repeated patterns, oversharpening, or a smooth-looking surface that has lost real detail. If the short test helps, apply the same reviewed approach to more footage; otherwise adjust your source preparation or settings.


Helpful context

Pick the right starting point

If the destination looks different from an example you have seen, identify the specific route before following its controls. These related guides cover the questions most likely to change your next step.

Set expectations

Limits and edges

Upscaling can change how footage looks, but it cannot establish what the camera truly captured. Review important content against the original.

Missing detail stays uncertain

When the source contains unreadable signs, severely blurred faces, or objects hidden by compression, a convincing-looking SeedVR output is not proof that those details are correct. Sharper appearance and factual accuracy are different measures.

WorkaroundKeep the original beside the processed version, and verify names, text, or identifying details using a reliable source outside the video.

Motion can expose artifacts

An isolated frame may look clean while moving hair, foliage, patterned clothing, or thin lines shimmer during playback. Cuts and camera movement can make a video upscaler's weaknesses more noticeable than a still-image comparison suggests.

WorkaroundReview the same short passage at normal speed and pause at several points around motion and scene changes.

Input and output options vary

This guide cannot guarantee that the linked SeedVR route accepts your codec, file size, duration, or desired output format. Nor does it establish processing time or availability; those depend on the destination and its current conditions.

WorkaroundCheck the destination's displayed requirements before uploading, and prepare a short compatible test file if needed.

More processing is not always better

Repeated enlargement, heavy sharpening, or extra restoration passes can emphasize compression blocks and produce artificial textures. A larger file or a more detailed-looking frame is not automatically a more faithful one.

WorkaroundChange one setting at a time, compare at your intended viewing size, and retain the least-processed result that meets your goal.

Visual checkpoint

What to inspect in a before-and-after view

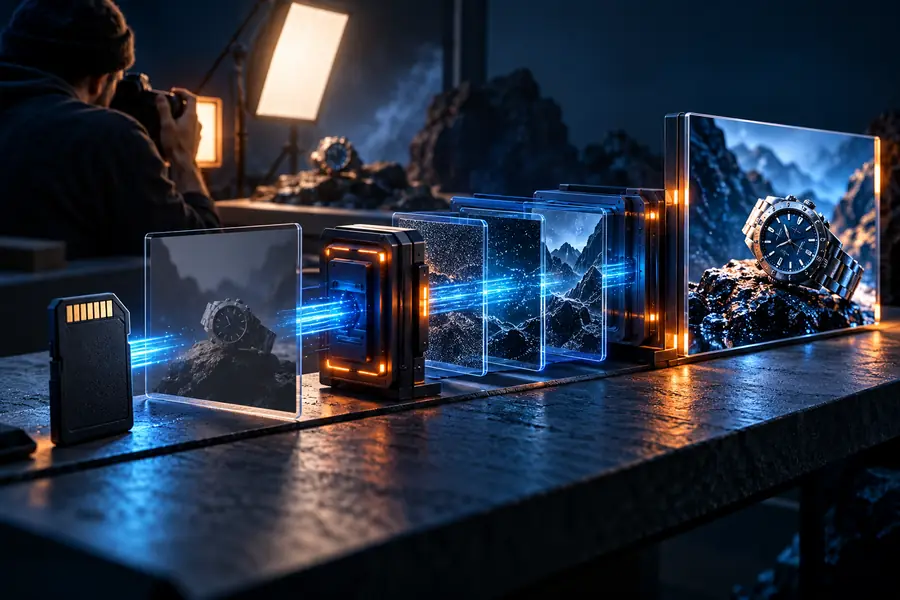
Use a matched crop to judge edges and texture, then return to the full moving clip before accepting the result.

Before: softer view

Softer camera and product scene used as an illustrative before view
Sharper camera and product scene used as an illustrative after view
After: sharper view

Illustrative comparison, not a verified output from the linked SeedVR route. Look for improved readability without halos, altered lettering, or invented fine texture.

Ready to test

Try your own clip

Make a small test before processing the whole video

Open the linked SeedVR destination, check its current input requirements, and start with a representative sample if supported. Save the original, compare the result during playback, and continue only when the improvement holds up across the scenes that matter to you.

  • Choose a short clip with motion and fine detail
  • Confirm the destination's current options
  • Compare source and result at the same viewing size

Workflow questions

Frequently asked questions

Preserve the original and choose a short, representative segment for your first test. Include difficult content such as motion, text, or faces so the result tells you something useful about the full video.

Do not assume a text prompt is part of the workflow. Check the controls on the specific SeedVR destination you open, supply only inputs it requests, and use its current instructions rather than controls shown in another implementation.

Compare source and output at the same display size, then watch both through the same moving sequence. Look for useful clarity in important details and check that faces, text, and edges have not gained distortions or flicker.

A short test is the safer starting point because it can reveal unsuitable input, unwanted artifacts, or settings that do not meet your needs. Once you have reviewed that result, check the destination's current limits before attempting a longer clip.

An upscaled result may look more legible, but appearance alone cannot confirm missing information. Keep the original available and verify consequential text or identifying details independently.

Open upscaler
Open upscaler